


Manager
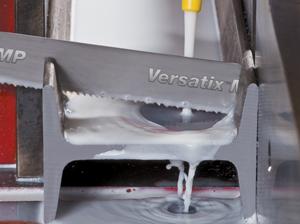
Figure 1Be sure to select a blade that is suitable for performing interrupted cuts on structural materials. This will help minimize force and stress on the blade's teeth, which will help prevent tooth breakage. Photos courtesy of The L.S. Starrett Co.
Welders constantly confront challenges when band sawing a variety of materials and shapes, including solids, structurals, tubes, bundles, and angle iron. Performing interrupted cuts is commonly required on many of these materials when sawing cross sections. In tubes, for example, the blade enters, exits, and then re-enters the hollow shape, producing increased force and stress on each saw tooth. As a result, when one tooth leaves contact with the cut and the next tooth enters the cut, the force is so tremendous that tooth breakage can occur. Once a single tooth chips or strips, it puts more stress on the other teeth, and can eventually lead to premature blade failure.
It is vital to select blades that are optimized for making interrupted cuts and performing structural sawing. New tooth designs on the market feature technology that dissipates force, especially heat, during cutting to substantially minimize tooth breakage and maximize saw blade life (see Figure 1). Also, positive-rake tooth designs offer efficient interrupted cutting on beams, channels, and tubes on which shock loading conditions are common.
After the appropriate blade has been selected, it is also important to follow a few guidelines, which will help you greatly increase your chances for successful sawing while achieving good-quality-cuts.
Blade pitch is defined as the number of teeth per inch. The number of teeth that come in contact with the workpiece can affect both blade performance and durability. Too few teeth in contact with the work can lead to early tooth strippage. On the other hand, too many teeth can greatly reduce cutting rates and ultimately make the material impossible to cut. Lower cutting rates mean less penetration per tooth, causing more rubbing than cutting, which can result in substantial work hardening of the material.
A constant pitch blade (uniform distance from one tooth tip to the next tip) can increase harmonic vibrations. Harmonic vibrations can lead to excessive noise, undesirable saw or saw blade vibrations, and, in severe cases, bad cuts. A variable-pitch blade—teeth that vary in gullet depth, set angle, and pitch—can greatly reduce harmonic vibrations. With varying tooth spacing, sawing rhythms are interrupted, chip evacuation is improved, and vibration is reduced, resulting in less noise and a better overall cut (see Figure 2).
Properly breaking in a bimetal band saw blade ensures longer blade life, faster cuts for a longer period of time, and consistent performance. Conversely, blade life can be significantly compromised if the proper break-in procedures are not followed.
The teeth on a new band saw blade are razor-sharp. If teeth are not broken in properly, the edges will chip and will wear out faster and result in rougher cuts. To withstand the cutting pressures of band sawing, each tooth should be honed to create an extremely small radius on its tip.
For soft materials like aluminum and carbon steel, first run the normal surface feet per minute (SFM). Adjust the feed pressure to about half of the normal cutting rate for the first few cuts or for the first 50 to 100 square inches. From there, gradually increase the feed pressure to the normal cutting rate. It is important to avoid vibration.
For hard-to-cut materials such as nickel-based alloys like INCONEL®, hardened steels, tool steels, and stainless steels, run the normal SFM and adjust the feed pressure to about three-fourths the normal cutting rate for the first few cuts or for the first 25 to 75 square inches. Gradually increase the cutting rate for the next few cuts until you reach the normal cutting rate. Again, try and avoid unnecessary vibration. n


The Welder, formerly known as Practical Welding Today, is a showcase of the real people who make the products we use and work with every day. This magazine has served the welding community in North America well for more than 20 years.
start your free subscription
Easily access valuable industry resources now with full access to the digital edition of The Fabricator.

Easily access valuable industry resources now with full access to the digital edition of The Welder.

Easily access valuable industry resources now with full access to the digital edition of The Tube and Pipe Journal.

Easily access valuable industry resources now with full access to the digital edition of The Fabricator en Español.
In this episode of The Fabricator Podcast, Caleb Chamberlain, co-founder and CEO of OSH Cut, discusses his company’s...


