


Manager of Specialty Gas Products
Oxyfuel brazing is a simple yet effective metal joining method that produces sound, leakproof connections. Be sure you are familiar with the common brazing alloys, how to prepare the base metal and fittings, and navigate through potential pitfalls to ensure optimal results.
Oxyfuel brazing is a simple yet effective method for joining metal that produces sound, leakproof connections. In brazing, an oxyfuel torch is used to heat the base metal to the correct temperature—above the melting point of the filler metal but below the base metal’s melting point. Capillary action then draws the melted filler metal between the two closely fitted surfaces to form an ideal seal.
When oxyfuel brazing is chosen over welding for metal joining it is because the process is simple to perform, does not melt or otherwise distort the base metals, and allows for high tolerance control. Another reason that many people opt for brazing is the ability to produce joints without the need for secondary finishing and to allow joining of dissimilar materials.
Manual oxyfuel brazing of copper is common throughout industry, especially in air-conditioning and refrigeration applications. Here’s a primer on the popular process.
One of the main differences between brazing and soldering is working temperature. Soldering takes place below 840 degrees F and uses tin as the primary alloying element. Braze alloys are copper-based and tend to melt at higher temperatures—above 1,190 degrees F for copper joining. Both soldering and brazing provide seals via the previously mentioned capillary action, where the melted filler flows into the space between a tube and fitting, known as the capillary space, and adheres to the tube and fitting surfaces. Brazing delivers greater fatigue resistance and developed joint strength than soldering.
Brazing is used in both repair and high-volume manufacturing. While repair entails manual brazing, manufacturing uses manual and automated brazing in operations large and small. For example, residential air conditioners, with thousands sold of each model, requires automated flame brazing of copper U-bends in an assembly line production method. Commercial airconditioning units, on the other hand, are often batch-produced in smaller volumes. For these assemblies, manual brazing provides the necessary versatility and efficiency.
Copper-to-copper joining primarily employs two families of brazing alloys, designated by the American Welding Society as BCuP and BAg.
BCuP (B = Brazing; Cu = Copper; P = Phosphorus). This is a copper-phosphorous alloy that contains anywhere from 0 to 18 percent silver. Phosphorus serves as a deoxidizer, which eliminates the need for a separate chemical flux. It also lowers the alloy’s melting point. Silver acts as a wetting agent to improve adherence, and its addition also contributes to lowering the alloy’s melting point. This alloy family is the most frequently used for copper brazing (it is not designed to braze steel or other ferrous metals).
BAg (Ag = Silver). This alloy typically contains roughly 20 to 72 percent silver and can be used to braze copper with a flux, but most often is used to braze copper to other metals like brass or steel.
Properly prepared base metal is a key factor in successful brazing. Cut the tube or pipe with a tube cutter to exact length and square. If you are using a hacksaw, be sure to use a sawing fixture to achieve a square cut. Also, remove any burrs from the inside and outside diameters and make sure that the tube is not out of round (see Figure 1).
The joint surface areas must be clean, so remove oil, grease, or oxide contamination. A stainless steel wire brush, emery cloth, Scotch Brite®, or similar abrasive will work just fine. Use commercial solvents to remove oil and grease and then wipe down the tube and fitting surfaces with a clean, dry cloth.
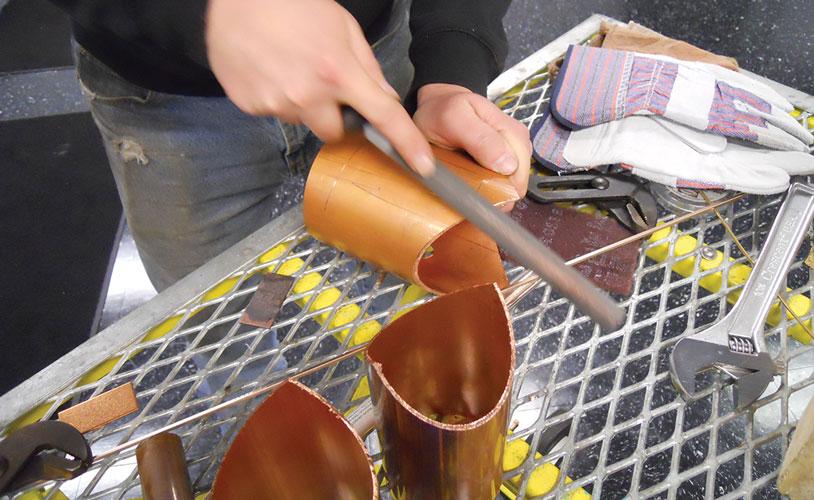
Figure 1
Be sure to remove any burrs from the tube inside and outside diameters in preparation for brazing.
If one metal is brass or bronze, you must use a flux. Apply a thin layer of flux with a brush and assemble the tubes and fittings. Maintain support so that the workpiece remains aligned properly, at least until a few seconds after brazing.
HVAC, medical gas, and other critical applications require an inert gas—typically nitrogen—to purge the inside of the tube during brazing. The nitrogen displaces the oxygen and prevents oxide scale from forming inside the tube.
Most oxyfuel brazing processes call for a slightly carburizing or neutral flame. A neutral flame has a bright-blue, well-defined inner cone, while a carburizing flame has a less defined, or feathered, inner cone. Carburizing flames, if correctly set, remove surface oxides from the copper and help improve the appearance. Avoid an oxidizing flame. Remember, the goal is cleaning and fluxing to remove metal oxide and protect the part during heating. The oxidizing flame promotes oxidation, which will inhibit braze-alloy flow.
To start, apply the flame at a point just adjacent to the fitting and heat the tube first (see Figure 2).
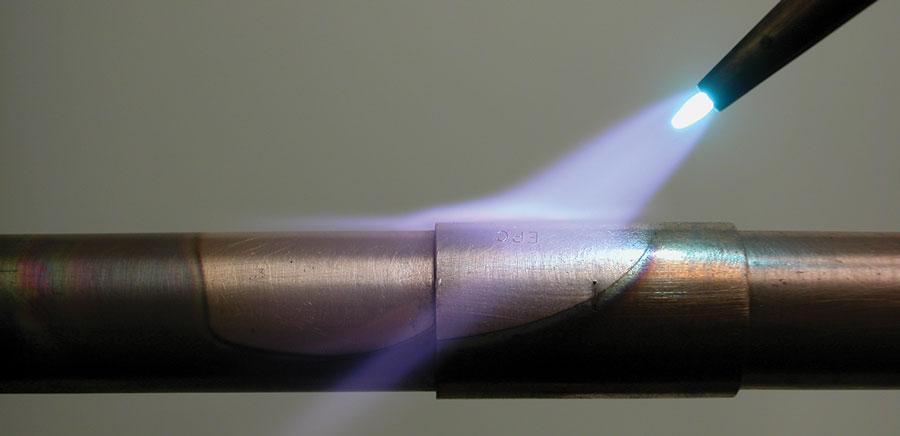
Then work the flame alternately around the tube and fitting (see Figure 3) using short motions until both reach brazing temperature.
Keep in mind that flux is a good temperature indicator. Continue heating until the flux completes a bubbling phase and becomes quiet, fluid, and transparent—like water. This is a visual cue that parts are close to brazing temperature. To maintain uniform heat in the tube and fitting, sweep the flame back and forth along the axis of the tube, joint, and fitting.
Next up is adding the brazing alloy.
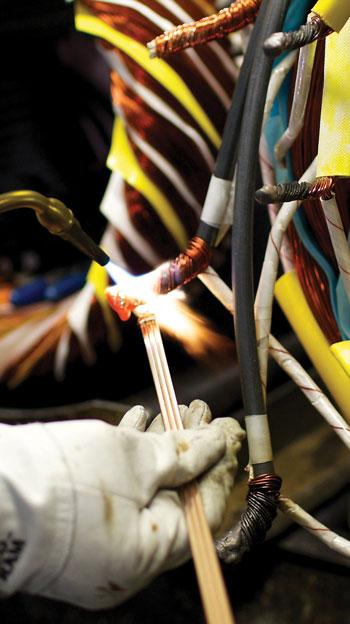
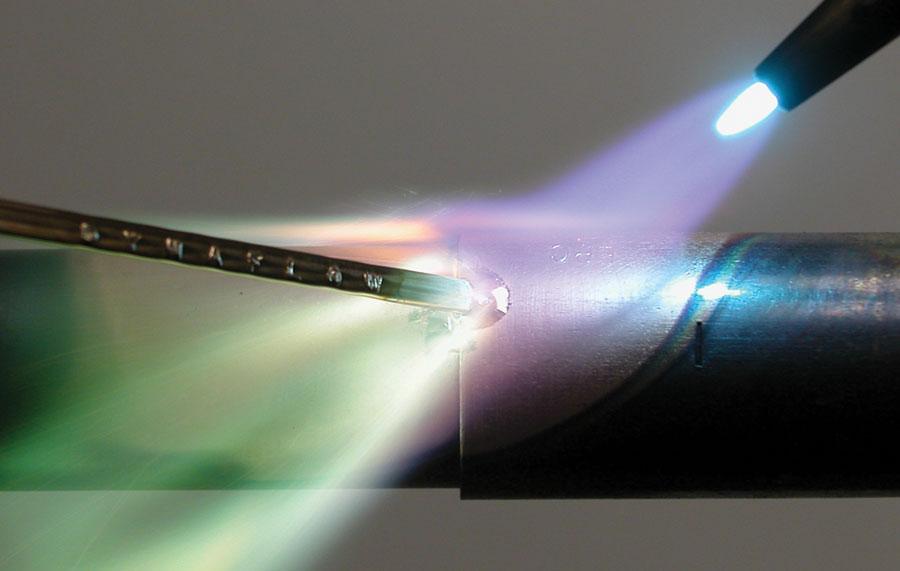
The brazing alloy, in wire or rod form, should be fed into the joint between the tube and fitting (see Figure 4).
Again, do this only after the base metals have been heated to brazing temperature. Direct the flame to the tip of the brazing alloy to begin the melting process and continue sweeping the flame back and forth over the tube and fitting as the alloy is drawn into the joint.
If the brazing alloy must move vertically up from the tube into the joint, apply heat to the tube first, then the fitting, ultimately bringing both pieces to temperature evenly. Keep the flame directed toward the fitting, because if the tube overheats, the brazing alloy may run down the tube rather than into the joint.
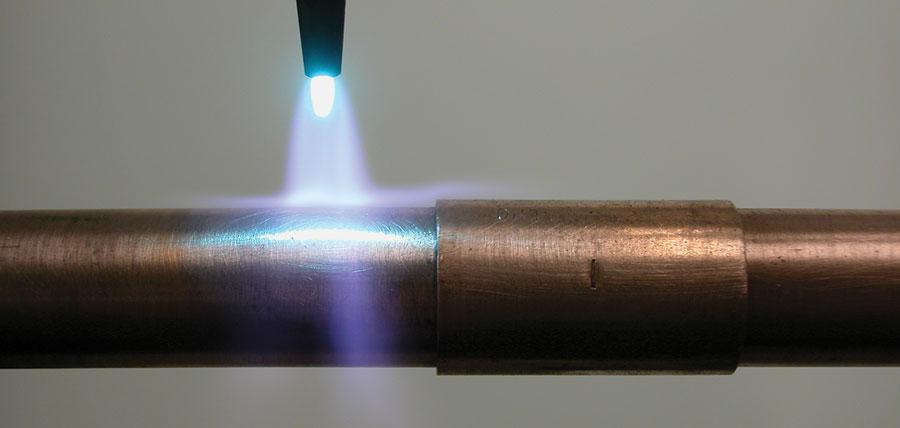
Figure 2
To start the heating process, apply the flame at a point just adjacent to the fitting and heat the
tube first.
The alloy will fill all joint areas, assuming that you have prepared the joint properly, reached brazing temperature, and selected the appropriate brazing alloy. There’s no need to feed more brazing alloy once the joint is filled; doing so offers no added benefits and only wastes the alloy.
As soon as the brazing alloy has set, use a wet swab or brush on the joint end to remove any flux residue. An emery cloth or a wire brush can be used if necessary. For proper inspection and pressure testing, be sure to remove all residue. If the process is performed properly, brazing will deliver a fully sealed joint.
As with any joining process, there are pitfalls. Here are some common problems that you may encounter as well as some advice on how to fix them.
Pitfall No. 1: The outside of the joint is hot, but the inside is not hot enough. Remember to heat the tube first, which will conduct heat into the fitting to raise the inside temperature.
Pitfall No. 2: The flux has broken down due to excessive heat. Flux can become saturated with oxides if it is overheated, preventing flow of the brazing alloy. A softer flame or a heavier coating of flux will help.
Pitfall No. 3: The brazing alloy balls up instead of running into the joint. Either the base metals have not reached brazing temperature, and the alloy has been melted by the torch flame, or the joint has overheated, resulting in flux that no longer is active. Review the heating procedure. Another possibility is that the base metals are not properly cleaned.
Pitfall No. 4: The brazing alloy flows away from, instead of into, the joint. The fitting may not have reached the proper brazing temperature. Direct the flame toward the fitting.
Pitfall No. 5: The brazing alloy cracks after it solidifies. With copper connections especially, a likely cause is insufficient braze penetration into the joint. This may cause the brazing alloy to crack under stress or vibration. Be sure to hold to recommended clearance and review your brazing technique.
This also can occur if you are brazing dissimilar base metals, especially if they are quenched too quickly. Let the joint cool for a longer period before you wash off the flux residue.


The Welder, formerly known as Practical Welding Today, is a showcase of the real people who make the products we use and work with every day. This magazine has served the welding community in North America well for more than 20 years.
start your free subscription
Easily access valuable industry resources now with full access to the digital edition of The Fabricator.

Easily access valuable industry resources now with full access to the digital edition of The Welder.

Easily access valuable industry resources now with full access to the digital edition of The Tube and Pipe Journal.

Easily access valuable industry resources now with full access to the digital edition of The Fabricator en Español.
In this episode of The Fabricator Podcast, Caleb Chamberlain, co-founder and CEO of OSH Cut, discusses his company’s...


